How to Set Up WiFi on Your Hisense TV without a Remote
How to Set Up WiFi on Your Hisense TV without a Remote – Prepare to be amazed by a mind-boggling statistic: a whopping 65% of Americans embark on a monthly quest to locate their vanishing TV remotes. It’s a real-life treasure hunt, except instead of seeking chests of gold doubloons, they’re desperately searching for that mystical wand that reigns supreme over their TV realm.
Let’s be honest, losing the remote control can swiftly transform a serene TV viewing experience into a chaotic whirlwind, particularly when your streaming extravaganza encounters the dreaded roadblock of a sudden WiFi disconnection.
But fear not, intrepid adventurer! The modern world of televisions is a captivating realm brimming with limitless possibilities and mesmerizing features. If you find yourself yearning to establish a WiFi connection on your trusty Hisense TV, yet find yourself bereft of your loyal remote control, worry not! I shall be your guiding light through this labyrinthine conundrum.
Set Up WiFi on Your Hisense TV without a Remote
How to Connect Hisense TV to WiFi Without a Remote
In the vast realm of technological wonders, one may encounter the perplexing situation of wanting to connect their Hisense TV to WiFi but lacking a remote. Fear not, for I shall enlighten you with not one, not two, but three proven methods.
Connect Hisense TV to WiFi Using a USB Keyboard or Mouse
We’ve got the step-by-step instructions to get your Hisense TV connected to WiFi using a USB keyboard or mouse. So, let’s dive in!
First things first, let’s get that wireless mouse or keyboard ready. It’s a breeze to connect them to your TV, and most Hisense models won’t require any extra tinkering. Simply grab the USB adapter that comes with your wireless mouse or keyboard and plug it into one of the USB ports on your trusty Hisense TV. And just like that, the connection magic begins!
If you need a little more guidance, here’s a detailed breakdown of the steps:
- Power up your Hisense TV using the good old power button. You’ll usually find it somewhere on the TV itself, and it’s your gateway to settings, volume control, channel hopping, and more.
- Now, take that wireless keyboard or mouse adapter and gently insert it into one of the USB ports on your TV. Make sure you handle it with care.
- Time to take control! Use the mouse or give that TV button a click to bring up the settings menu on your screen. It’s like having a digital remote at your fingertips.
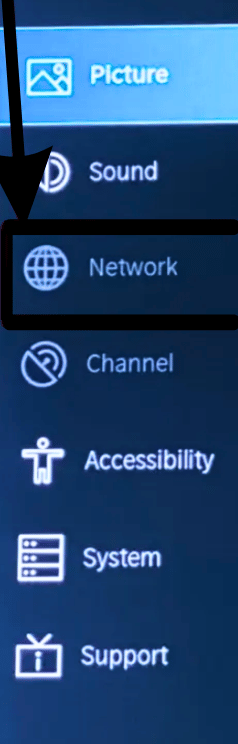
- Within the settings menu, locate the ‘network’ option. Once you’ve found it, give it a firm tap or click. A dropdown menu will grace your presence.
- In this glorious dropdown menu, you’ll find the treasure you seek—’network configuration’. Choose it like a true adventurer ready for the next quest.
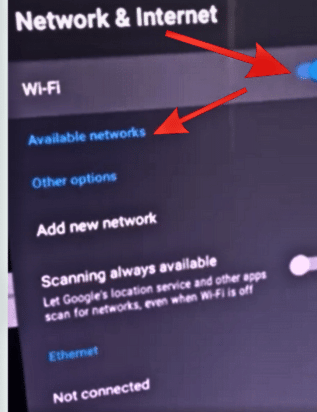
- Ah, the moment of truth! Now, select the WiFi network you want your TV to cozy up with. Find its name and click on it like a match made in digital heaven.
- To seal the deal, you’ll need to enter your WiFi password. Type it in carefully, mind those tricky characters, and once you’re done, click that ‘connect’ button. Victory shall be yours!
And there you have it! Your Hisense TV will now bask in the glory of a successful internet connection (WiFi).
Read Also: Hisense smart tv remote codes: 5 Digit, 3 Digit 4 Digit Remote For Hisense tv
How to Connect Hisense TV to WiFi Using the Joystick or Physical Buttons on the TV
If you happen to own a Hisense TV with a nifty joystick or physical buttons situated at the bottom, then you’re in luck! These handy buttons can be used to effortlessly access the menu and smoothly navigate through various settings.
To get started on your TV-tinkering adventure, simply follow these steps:
- Initiate your journey by venturing into the settings menu. You can accomplish this feat by cleverly employing the joystick or physical buttons at your disposal. Give ’em a tap or a nudge, and let the magic unfold
- Once you’ve gracefully entered the settings realm, scout out the elusive ‘network settings’ option. It’s like finding a hidden treasure on a digital map. Once you spot it, triumphantly click on ‘network configuration’ to proceed further.
- Ahoy, you’ve arrived at the crucial crossroads! Here, you’ll be presented with a range of network options to choose from. Take a moment to ponder and select the network that tickles your fancy. And oh, don’t forget to type in that sneaky WiFi password to gain access. We all know how those passwords love to play hide-and-seek!
- You’re almost there! With your network of choice and its password safely in hand, summon all your digital prowess and click on that delightful ‘connect’ button. And voila! If everything goes according to plan, you’ll have successfully established a WiFi connection for your beloved Hisense TV.
But wait, here’s a quick heads-up: Remember that not all Hisense TV models are created equal. So, while some may have these convenient control buttons or a joystick configuration, others may take a different approach.
Read Also: Hisense TV shows logo then goes black (quick fix solution in 2023)
How to Connect Your Hisense TV to WiFi Using an Ethernet Cable
Connecting your Hisense TV to WiFi through a wired connection can provide a stable and reliable network connection. In this guide, we’ll walk you through the step-by-step process of connecting your Hisense TV to WiFi using an Ethernet cable and the convenient Hisense RemoteNow app. By following these instructions, you can enjoy seamless streaming and online content on your Hisense TV.
Prerequisites
Before you begin, ensure that you have the following:
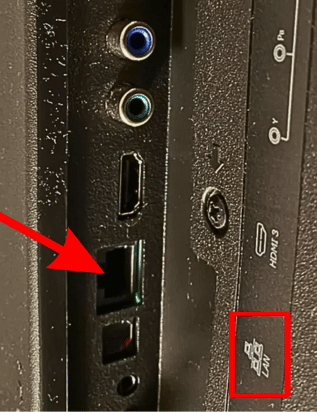
- A Hisense TV equipped with a LAN (Ethernet) port
- An Ethernet cable
- A smartphone connected to the same WiFi network as your TV
Step-by-Step Guide
To connect your Hisense TV to WiFi using a wired connection, follow these steps:
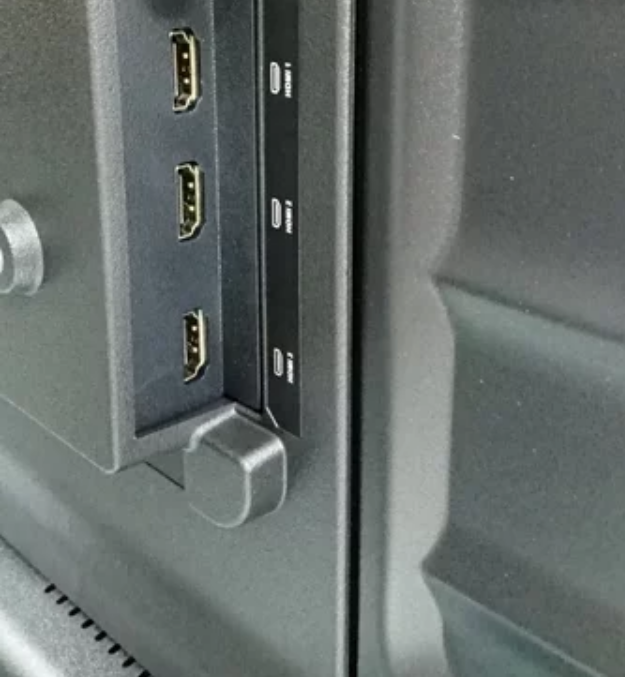
Step 1: Connect the Ethernet Cable
- Locate the LAN port on your Hisense TV.
- Connect one end of the Ethernet cable to the LAN port on your TV.
- Connect the other end of the Ethernet cable to an available LAN port on your router.
Step 2: Power On Your TV
- Press the power button located at the bottom of your TV to turn it on.
- As you are using a wired connection, your TV will automatically connect to your home network without requiring any passwords.
Step 3: Prepare Your Mobile Device
- Ensure that your smartphone is connected to the same WiFi network as your TV.
- Visit the app store on your mobile device (iOS/Android) and search for the Hisense RemoteNow app.
- Download and install the RemoteNow app.
Step 4: Pair Your RemoteNow App with Your TV
- Launch the RemoteNow app on your mobile device.
- Follow the on-screen instructions to pair the app with your Hisense TV.
- Once paired, you can use the app to navigate through the TV settings conveniently.
Step 5: Configure Network Settings
- In the RemoteNow app, select the “network” option from the menu.
- Choose “network configuration” to access the network settings.
- Use the app to refresh the list of available networks.
- Locate your WiFi network in the list and select it using the RemoteNow app.
Step 6: Connect to Your WiFi Network
- When prompted, enter your WiFi password using the RemoteNow app.
- Click on “connect” to establish the connection between your TV and the WiFi network.
- Once your TV is successfully connected, you can unplug the Ethernet cable.
Automatic WiFi Connection (Future Use)
After completing the initial setup, your Hisense TV will remember the WiFi network name and password. This enables automatic connection to the network when you turn on your TV in the future. To utilize this feature, follow these steps:
- Power on your Hisense TV.
- Launch the RemoteNow app on your mobile device.
- Navigate through the app’s interface to access the desired settings and content.
FAQ
How to Set Up Your Hisense TV Without a Remote?
Setting up your Hisense TV without a remote is possible by following a few simple steps. Start by pressing the “menu” button on the TV itself, and then use the “channel controls” to navigate to the “setup” option. Once there, you can proceed with the TV setup process. However, it’s recommended to acquire a new remote for enhanced convenience and ease of use.
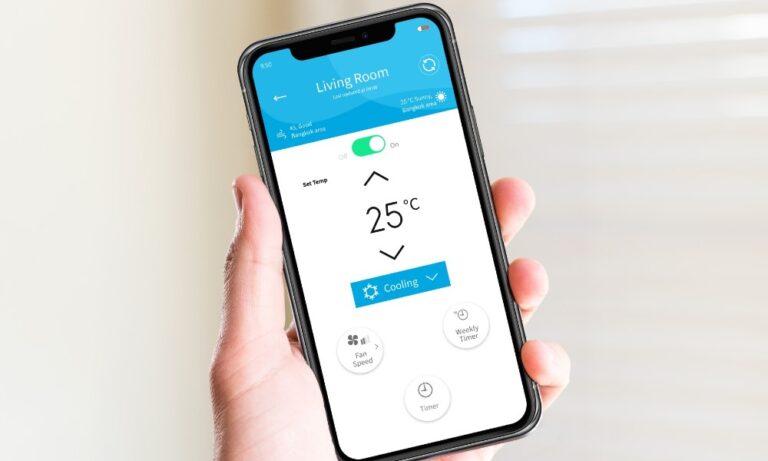
Controlling Your Hisense TV Using Your Phone?
Controlling your Hisense TV with your phone is a convenient option that can be easily set up. Begin by installing a remote control app on your phone and downloading the Android TV Remote Control app from the Google Play Store. Ensure that both your phone and the Android TV are connected to the same WiFi network. Open the Android TV Remote Control app on your phone and select the name of your Android TV. A PIN will then appear on your TV screen, allowing you to establish the connection.
Troubleshooting WiFi Connection Issues on Your Hisense TV?
Encountering difficulties when connecting your Hisense TV to WiFi? The problem might stem from misconfigured network settings. Always verify if your TV is set to “wireless connection” to establish the connection successfully.
Resetting Your Hisense TV Without a Remote?
Resetting your Hisense TV can be done in two ways: through a soft reset or a hard reset. To perform a soft reset, unplug the TV from the power outlet and wait for approximately 60 seconds before plugging it back in.
If the issue persists, attempt a hard reset by locating the reset button on the TV or a hole labeled “reset.” Insert a bent paper clip into the hole and hold it for 15 seconds until the TV restarts. Keep in mind that a hard reset may result in the deletion of your data and customized settings.
Powering On and Off Your Hisense TV Without a Remote?
Turning on your Hisense TV without a remote is a simple process. Find the power button located at the bottom of the TV and press it to turn on the TV. To turn it off, press the power button again.